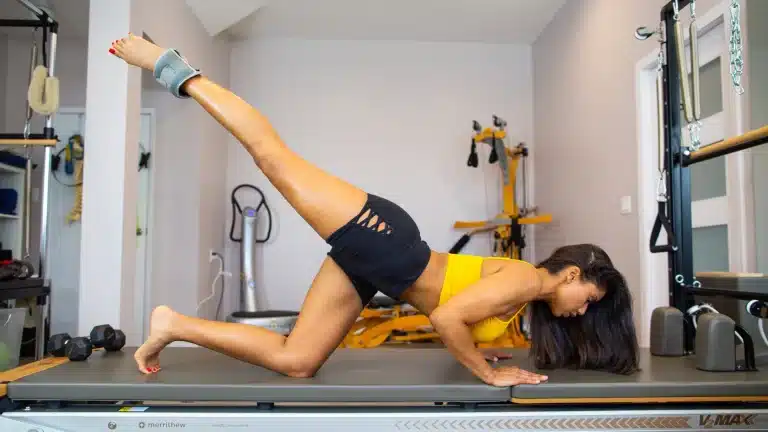
Wall Pilates Free Workout Plan (15-Minute At-Home Routine)
You can build strength and control without a studio or reformer. This wall Pilates free workout plan uses simple, low-impact movements with just a mat and a wall. The routine works as a quick 15-minute circuit or a longer session when you have more time.
This wall pilates free workout plan focuses on improving posture, core strength, and body awareness while staying gentle on your joints. Each session includes a warm-up, a focused main circuit, and a short cooldown, with easy options so you can adjust to your level.
Related Read: Aesthetic Pilates Workout Plan You’ll Stick To
The wall adds support and light resistance to deepen each movement without harsh impact. Focus on consistency over perfection—practice weekly and you’ll build better control, strength, and overall fitness over time.
What IS The Wall Pilates Free Workout plan

A stable surface transforms familiar mat exercises into something closer to a reformer—without a machine. This gives you instant feedback and a place to press your feet or hands so each move feels clearer and more effective
Low impact doesn’t mean easy. Slower tempos, longer holds, and steady core engagement raise the demand without jumping.
Wall Pilates Results
This method targets practical outcomes: improved strength, flexibility, stability, balance, and control. You gain a more capable body through consistent, focused training.
- Clear feedback for better alignment
- Higher muscle recruitment with less joint stress
- A precise practice where intensity comes from control, not speed
Benefits You Can Expect From a Consistent Wall Pilates Routine
Regular practice against a firm surface helps you recruit deeper muscles and move with more care. Over weeks, you’ll notice improved posture, steadier balance, and less daily strain.
Core strength that supports your spine and posture
A steady routine trains deep core muscles that support your spine and reduce back tension. This support helps you stand and sit with better alignment in everyday tasks.
Better body awareness and movement control
Slow, focused repetitions teach you to feel alignment at your ribs, hips, knees, and ankles. That awareness carries into lifts, steps, and other activities, so your movements feel safer and more efficient.
Potential feel-good perks from elevating your feet
With your feet raised against the surface, many people report improved circulation, easier digestion, and calmer sleep. Instructor Callie Jardine notes these recovery-related sensations are common when feet are elevated.
- You’ll build deep core engagement that supports spine health and posture.
- You’ll sharpen body awareness through slow, controlled motion.
- You’ll gain practical control that transfers to other exercises and daily life.
- You may feel circulation and recovery benefits from elevating your feet.
- Track small wins—less back strain, steadier balance, smoother movement—to stay motivated.
Who This At-Home Wall Pilates Workout Is Best For
You can use a simple surface to learn alignment, reduce joint stress, and still feel challenged. This approach suits many fitness levels and makes progress easy to track.
If you’re a beginner building foundational strength
This wall pilates routine gives beginners a clear, safe way to build core and hip strength. Moves are low-impact but designed to teach control and alignment step by step.
If you want joint-friendly workouts with real muscle burn
Slow tempos and steady holds create a serious muscle challenge without pounding your joints. You’ll feel fatigue in targeted areas while protecting sensitive knees and back.
If you’re short on time but want consistency
Use the 15-minute option when you have limited time. Short, repeatable sessions are a practical way to build habits and steady gains at home.
- You’ll see if this wall pilates workout matches your goals for safe progress.
- Support from the surface makes exercises more accessible while you learn from.
- Keep an eye on pain: sharp or persistent discomfort means stop and consult a clinician or qualified instructor.
What You Need Before You Start
Before you begin, gather a few simple items so your session runs smoothly and safely. These basics cut distractions and let you focus on form.
Your checklist
Grab these essentials:
- A sturdy wall and a yoga or pilates mat for cushioning and traction.
- A timer or stopwatch, water, and a towel within arm’s reach.
- Comfortable, breathable clothing that won’t restrict hip or leg movement.
Pilates grip socks help
Grip socks add traction if your floor is slippery or if you tend to slip with your feet. They can make pressing and bridging more secure.
Setting up a safe space
Clear enough room to fully extend your legs and move without hitting furniture. Use a solid section of wall that won’t shift.
| Item | Why it matters | Tip |
|---|---|---|
| Mat | Protects knees and back on the floor | Choose a non-slip material |
| Timer | Keeps rounds consistent | Use intervals for progress |
| Water & towel | Hydration and quick clean-up | Keep nearby to avoid breaks |
| Pilates Grip socks | Better traction for feet | Optional on carpet or rubber floors |
Form and Safety Cues to Protect Your Back, Knees, and Hips
Smart positioning and slow reps protect your lower back and knees every time. Use a few clear cues so each movement stays safe and effective.
How to keep your lower back from arching during bridges
How to align ankles under knees in wall sits and squats
In single-leg work, keep hips steady. Do not let the pelvis rotate—control wins over depth when fatigue sets in.
- You stay in control of your range; stop if you feel sharp pain.
- Protect the lower back by pressing it toward the mat and avoiding rib flare.
- Stack shoulders over wrists in supported planks for upper-body stability.
- Keep ankles under knees in sits and squats to cut knee strain and boost leg engagement.
- Favor quality reps and steady control over speed or extra depth.
| Issue | Quick Cue | Modification |
|---|---|---|
| Lower back arching | Stack ribs over hips; press into mat | Reduce lift height; focus on pelvic tilt |
| Shoulder collapse | Align shoulders over wrists; press through palms | Drop to knees or shorten plank hold |
| Knee tracking inward | Keep ankles under knees; push knees outward slightly | Use shallower squat depth |
| Hip drop in single-leg | Keep hips level; brace core | Return to both feet until stable |
Warm-Up You’ll Do Every Time
Start every session with a short sequence that wakes your muscles and sharpens your focus. A brief warm-up raises circulation and helps your body move more safely during the main session.
Quick standing warm-up to increase blood flow
Begin with 1–2 minutes of marching in place and gentle arm circles. Keep the pace easy so you warm up without tiring.
Spine mobility to prep your core and back
Use a standing cat-cow to mobilize the spine. Flow slowly, inhaling to lift the chest and exhaling to tuck the pelvis.
wall pilates free workout plan you can follow today
Try a short circuit that fits any schedule and still leaves you feeling stronger.
Structure your session as a warm-up, five-exercise circuit, then repeat the circuit 1–2 more times based on energy and available time. This way, you get clear rounds and measurable progress.
Related Read: Pilates Schedule: Discover Your Perfect Workout
Timing options
For a fast option, do one warm-up and two full rounds for about 15 minutes. If you have more time, add a third round and slightly longer rests to reach ~30 minutes.
Reps vs. time
Choose reps when you can keep form consistent—aim for a set number per exercise. Choose timed sets when you want steady control and to challenge endurance.
Modify and progress
Lower intensity by shortening rounds or cutting reps. Increase intensity with slower tempo, more rounds, or longer holds. Pick a routine you can repeat several times weekly for steady fitness gains.
The Main Wall Pilates Circuit: Your Five Key Exercises

Follow this compact sequence to target core control, hip strength, shoulder stability, and balance in a single round.
Center yourself facing the wall and press your feet or hands into the surface for steady feedback. Move with intention and steady breathing through each rep.
1. Single-leg knee crunch
Targets deep core stability and anti-rotation. Do 15 reps per side, keeping the opposite leg long and controlled as you crunch.
2. Wall bridge + calf raise
Builds glute and hamstring strength while challenging ankle control. Do 15 reps, lifting hips then rising onto heels with a slow return.
3. Reach backs
Focuses on shoulder control, core integration, and full-body coordination. Do 10 reps per side, pressing through the feet and maintaining a neutral spine.
4. Marching bridge
Trains pelvic stability and anti-rotation. Do 10 reps per side, keep your hips level as you lift one leg and hold alignment.
5. Wall sit + calf raise + arm raise
Challenges legs, balance, and arms together. Hold the sit and perform 15 calf raises while reaching arms overhead with control.
- You’ll feel targeted muscles in the glutes, hamstrings, quads, shoulders, and deep core when form is right.
- Follow the listed reps and repeat the circuit 1–3 rounds based on time and energy.
- Move slowly, press into the wall for steady feedback, and treat each rep like practice—not a race.
Beginner-Friendly Modifications and Smart Intensity Upgrades
Small adjustments let you keep progressing without pain or setbacks. These cues help you adapt each move to your current strength and comfort. Use them to protect joints while still getting the resistance and control that build muscle.

Scale down if your wrists, knees, or lower back feel stressed
If your wrists feel sore in planks, press into the surface with your hands higher or drop to forearms on the mat. Shorten hold time and reduce reps so form stays clean.
For knee discomfort, stretch your hamstrings and focus on tracking your ankles under your knees. Keep your hips level and stop at a depth that feels stable.
When the lower back twinges, use smaller bridge ranges and emphasize rib-to-hip stacking. Treat these as smart training choices, not setbacks.
Scale up with longer holds, extra rounds, or slower tempo
To raise intensity, slow the tempo and lengthen holds. Add one extra round or two more controlled reps to increase resistance without rushing form.
Longer holds force muscles to work under tension and improve endurance. Progress gradually, so control remains your priority.
Maintain control when fatigue hits
When muscles burn, take short rests to reset breath and posture. Shake out your legs, reset alignment, then return to controlled reps.
Prioritize quality over quantity. Fewer clean reps will give better gains than more sloppy ones.
| Issue | Easy Fix | When to Use |
|---|---|---|
| Wrist pain | Elevate hands on the wall or reduce hold time | During planks and reach backs |
| Knee strain | Reduce sit depth; check ankle alignment | Wall sits, squats |
| Lower back tension | Smaller bridge range; stack ribs over hips | Bridges, core reps |
| Fatigue | Short rest, deep breaths, reset form | Any circuit round |
How Often You Should Do Wall Pilates (and What to Pair It With)
Small, regular visits to the surface add up to measurable strength and mobility. Start with a simple goal and build from there.
Weekly consistency targets:
Weekly consistency targets for strength and flexibility
A good starting routine is 3 sessions per week. Aim for 20–30 minutes each session to develop strength and flexibility steadily.
If you prefer shorter bursts, 15 minutes across more days still helps you build control and movement habit.
What changes if you practice daily vs. taking recovery days
Daily practice can speed technical gains in your pilates practice, especially mobility and breath control.
But you need planned recovery: lighter sessions, active rest, or focused mobility to avoid fatigue and protect long‑term health.
How to combine pilates with cardio or strength training
Pair sessions smartly: use this routine as a finisher after strength days or as a core and mobility session on cardio days.
Sample week: 3x pilates sessions, 2x cardio, and 1–2 strength sessions. Adjust time and intensity to match your goals and energy.
“The best routine is the one you repeat. Choose a cadence you enjoy and protect recovery.”
- Pick a realistic time commitment you can repeat.
- Use lighter days to focus on mobility and breath.
- Track progress by how control and flexibility improve over weeks.
Cool Down and Recovery to Keep You Moving Well
Finish each session with a short cooldown to relax your breath and release muscle tension. This helps calm your nervous system and reduce next-day stiffness.
You’ll practice a breathing reset to lower your heart rate, gentle spinal decompression to ease the back, and simple wall-assisted stretches for the hamstrings, hips, and upper back. Keep each stretch easy and relaxed—flexibility improves best when you don’t force it.